Awhile ago at a hackathon, after my team and I expressed our iOS app idea and the complexities we were about to face to a table of Apple engineers volunteering their time, one of the engineers left us with one haunting sentence: “Just don’t have more than one person working on the same Storyboard at one time, or else.” 👻 Okay, the “or else” was totally just me.
Since working with my current company, where the pace at which we create new features and build apps from the ground up doesn’t always allow us to avoid being in the same Storyboard, I’ve decided to put that quote to rest and share some of the tricks I use to ease this collaboration.
Lock Up Before You Leave
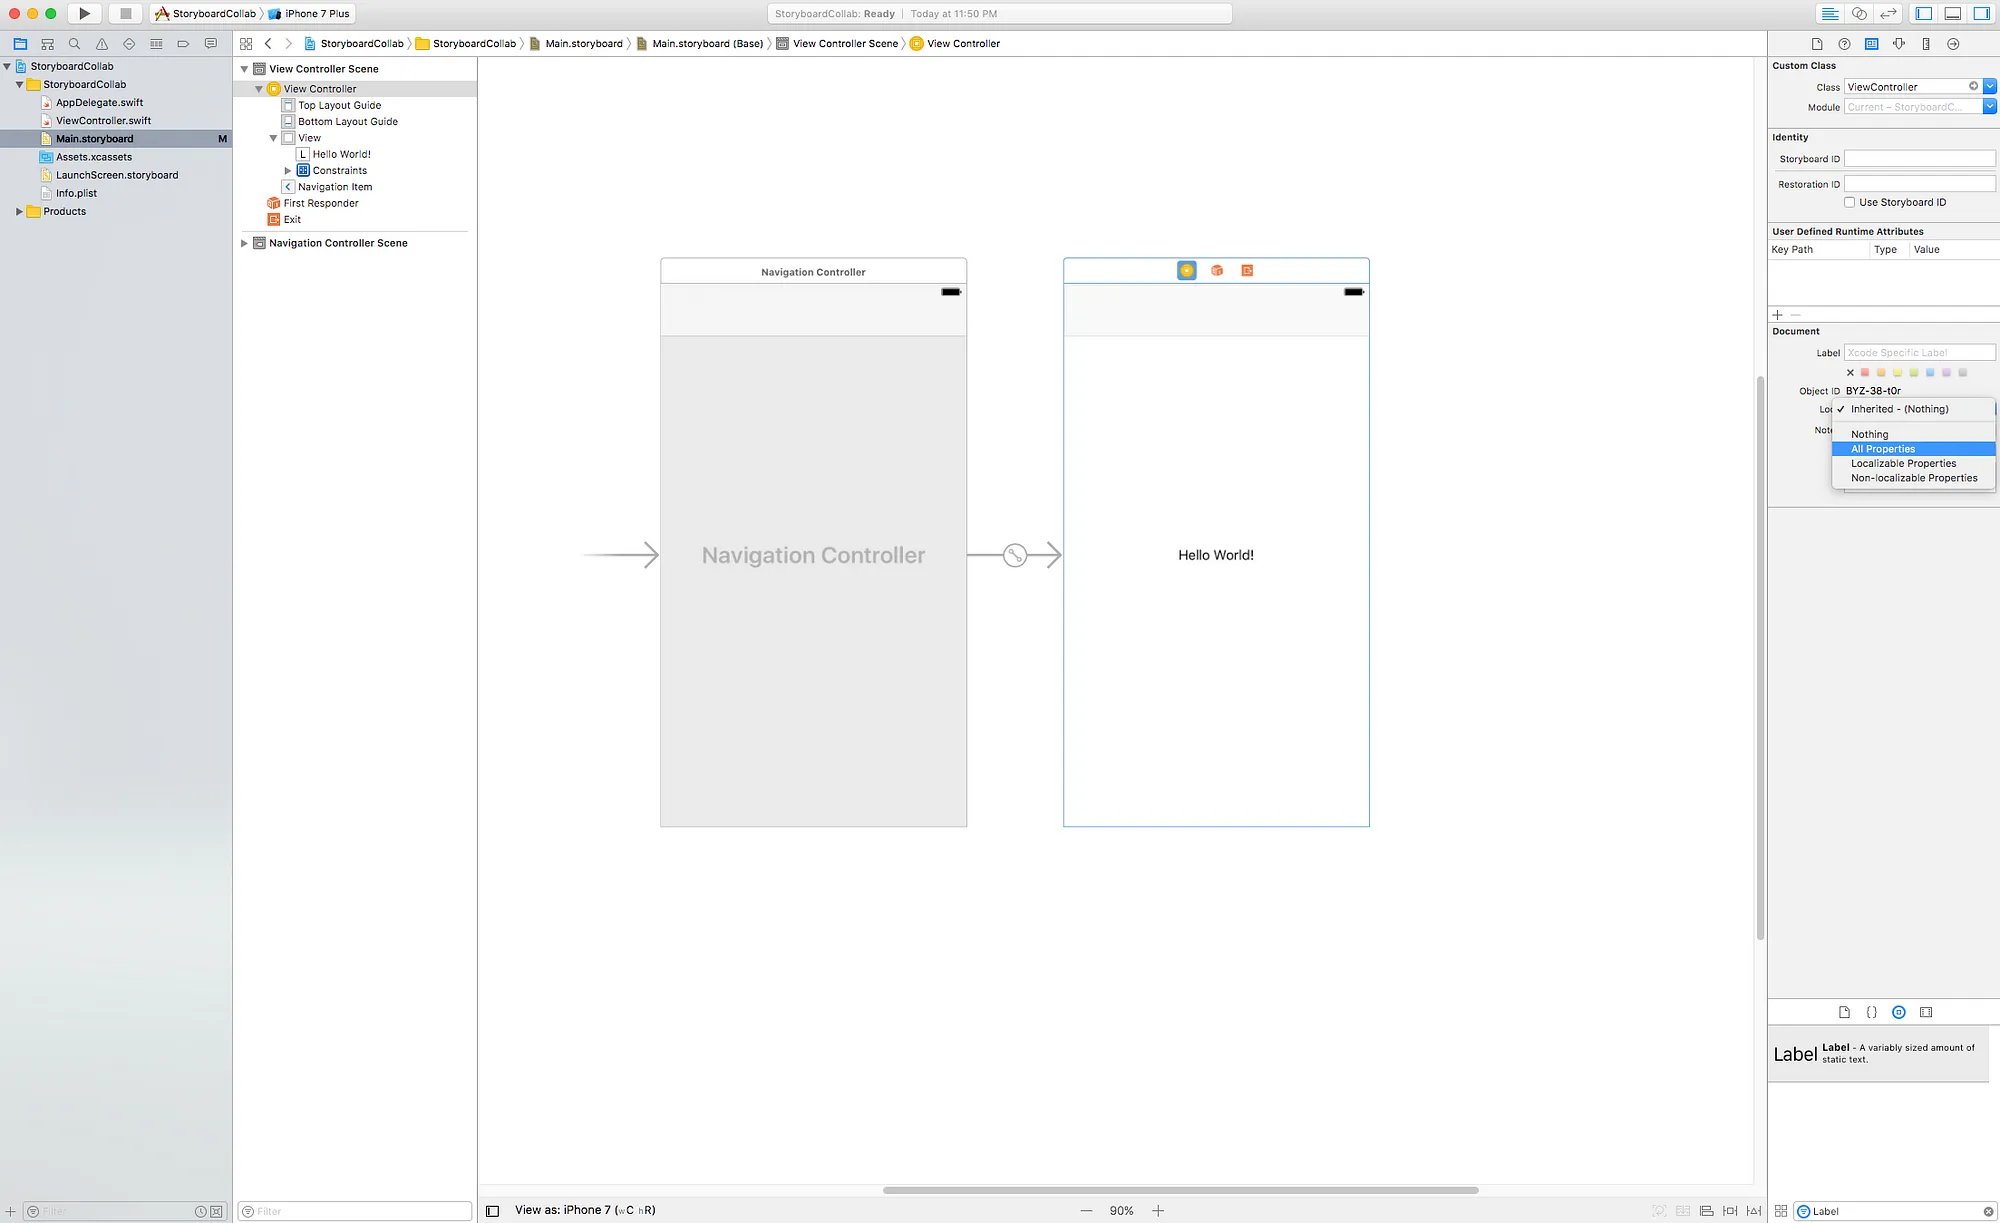
Locking View Controllers and their properties has probably been one of the most useful features I’ve used that has saved me many merge conflicts. I’m sure you’ve seen Xcode randomly change the height or width of an object by just a measly .5, or you may have accidentally moved a View Controller just slightly without knowing. Locking up is simple too, just click on your desired View Controller and open the Identity Inspector tab in the right pane, look under the Document section and choose Lock — All Properties. You can test that this works by attempting to drag your now locked View Controller around and see that it will pop back to place while signifying that it’s locked.

Review Before You Commit
Sure, Storyboard files aren’t written in Swift or Objective-C, but you should still look through each of the changes to the XML source code before hitting commit to ensure the changes it’s attempting to push are ones you actually meant to make. There are a couple regular changes that Xcode makes that you should avoid commiting when collaborating on a Storyboard file:
Minor Frame Changes
As I stated before, you may notice many little changes throughout the Storyboard file that Xcode may have made, such as a .5 change in a rect’s height. If you are creating a single feature, and a single View Controller, you should be able to tell if this was your change or not by seeing the block of XML that belongs to your new View Controller, which will begin with the name of your View Controller as such:
<!--View Controller-->
Discrepancies In Xcode and Device Versions
While I highly recommend you and your team communicate which version of Xcode you are using for your project ahead of time, sometimes you get added in the middle of a project, or you bring your work home and forget you have a different version of Xcode on your home machine. This is when you’ll start seeing changes at the top of your Storyboard XML — most commonly changed will be the version, toolsVersion, systemVersion, and device settings. These automatic changes can be discarded from the commit as the other developer will most likely also have similar automatic changes, leading to a conflict that will need resolving.

Merging Storyboards
Say you and a fellow engineer are tasked with creating a signup flow for your app that includes a 4-step registration flow (4 separate View Controllers) and a final review screen (another View Controller). The review screen contains the complexity of all the previous View Controllers in one, so you split the task. But there’s one problem-the Storyboard file isn’t created yet. You could create the first screen of the signup flow, push it, and following the steps above your coworker can start working on that file, but that’s not really realistic. Instead you can both work in your own Storyboard and bring them together when you’re finished!
Once you are both finished with your features, simply pull up both Storyboard files, select everything in one, copy, and paste to the either and hook up any necessary segues. All your Outlets should be retained (unless you had Storyboard reference’s referencing your now deleted Storyboard).